Ms. Ruin's Playthings


"The imagination imitates. It is the critical spirit that creates." -Oscar Wilde

Wednesday, January 1, 2014

Wood & Metal Crosses

Happy New Year!  I know it's been a long while since I've blogged but believe it or not, I did manage to do a little crafting over the holiday's and I wanted to share those projects with you.  Not to overwhelm myself, lets start with these wood & metal crosses.  Let me just say that I think they are MUCH MORE beautiful than these pictures can show you.  I wish I had photographed them with a different camera but what's done is done.  Remember that you can click on every image to view it larger.


I would like to thank my friend Carolyn Ross for showing me how to make these gorgeous crosses.  Honestly, I could not have done it without her and believe it or not, I'm not the best student.  So I'm going to do my very best to give you instructions on how to make your own cross!

Supply List:  Wooden Cross, Metal by the Sheet, cuttlebug and embossing folders of your choice or other embossing machine, 8x10 or 12x12 sheet of scrap paper to make a template for your cross, Sharpie or permanent marker, Scissors, VerDay Paint & Patina, Humungo Killer Adhesive, a fibrous burnishing tool, sanding tool or block, narrow paintbrush, Vintaj Patina Opaque Inks in colors of your choice, and Vintaj Patina Glaze.

Directions:
1.  Trace the wooden cross onto the scrap paper to make a pattern/template, then cut it out.
2.  Paint wooden cross one solid color using a VerDay Paint of your choice.  Let it dry.
3.  Apply Humungo Adhesive to metal and then cut metal so that it fits in the embossing folders.  You'll want to cut enough to emboss various patterns in order to have a patchwork effect like the crosses seen here)
4.  Run embossing folders through cuttlebug using various patterns.  HUGE TIP:  Put metal in folder upside down to make inverted patterns that will be fun to fill in with the opaque inks later in the process. 
5.  Trace parts of the paper pattern from step one onto different pieces of embossed metal using a Sharpie.  This is where you get the patchwork effect.  I know this step sounds confusing so here is a visual to help:
Notice that all of the areas that are circled in yellow are different patterns I created using various embossing folders.  
6.  Now that you have your metal cut out, apply all pieces to the wooden cross.
7.  Burnish the edges of the metal where they meet the wood using a fibrous burnishing tool.
8.  Apply VerDay Paints --as many as you'd like, get crazy!  While paint is wet, spray patina directly onto the VerDay Paint.  Let dry --for several hours or overnight to allow paint to oxidize.  
9.  Sand down entire cross so that some, not all, but some of the metal is visible.  Blow air on cross to eliminate particles after sanding.  
10.  Time to add some color!  Using the Vintaj Patina Opaque Inks of your choice and a small/narrow paintbrush, fill in as many of the patterns on the cross as you'd like.  You can do all of it or just some of it.  It's completely up to you!  Let dry completely.
11.  Sand the entire cross down again to give the paint you just applied a distressed look.  Blow air on cross to eliminate particles after sanding.
12.  LAST STEP --this is the truly magical part:  Apply glaze to entire cross.  You can either use your finger to spread it, which I did, or a lint free cloth --I did that too with one of the crosses but I found that my finger is most effective.  This is going to give your cross a glorious shine!  Let dry and hang on wall.  :)

Optional Steps:
1.  Paint back side of cross once the glaze has completely dried or before starting your project.
2.  If your cross did not have a hook in back for hanging, you can drill a whole so that the cross lays flat against the wall on a nail. 

Phew!  That was quite a bit of work but all in all it was easy and very rewarding.  I will leave you with some close ups so that you can see some of the detail and how all of the elements come together to make a gorgeous piece of wall art.


Peace, love, and many blessings in 2014!

Ms. Ruin

Monday, July 1, 2013

A self-testament through sunflowers

The DFW area has been buzzing about all of the gorgeous Sunflower fields in Allen, McKinney, and Frisco and who doesn't want to photograph flowers that are larger than the size of their own head???  Unfortunately I started hearing that police were ticketing people for trespassing.  I can certainly see why they would do that --people were actually trampling the stocks and pulling them out of the ground.  What's wrong with people?  These are crops that belong to farmers!  So I decided to avoid the city sunflower craze and headed down 35 South between Waxahachie and Milford, Texas.  I heard their was sunflowers galore "in the country".  

I had a few things working against me:  The Texas heat, I'm talking 104 degrees, folks.  Then there's the fact that I was going alone --into a field of sunflowers.  It can be a little overwhelming for someone who is only 5'3" and all of the stocks are taller than I am.  Oh, and lets not forget the rattlers!  Although I didn't think I'd run into any, I was still very cautious.  Of course I wore a super cute outfit and makeup to match.  I looked at myself in the mirror and thought, "dang, I look super cute!!!" and then my next thought was "You're an idiot!!!!!"  So I packed tennis shoes and a pair of jeans...just in case!

50+ miles later I arrive at the State owned rest stop.  I'm surrounded by truck drivers, traveling families and a few strange individuals.  Yanno, what you'd usually see at a rest stop.  I grab my gear and head over to a table to change out the lens on my camera, etc.  I strap on my bag pack and with camera in hand I start walking towards the field that is located directly behind the rest stop.  I thought to myself..."this is a Lifetime Movie Original waiting to happen."

Oh, I left out one very important detail...the sunflowers were all dead.  ::sadness::  At first I was annoyed that I drove so far to a field only to find dead sunflowers.  I was really looking forward to this session seeing as how I have been so consumed with work, my fitness regimen, and editing photos for clients.  I just wanted some ME TIME.  But then I thought "Sonia, this is what you are known for.  This is why people enjoy your work, because you see beauty where most see atrophy."  And boy was I surrounded by atrophy!  Haha.  So I did just that...I found the beauty and I hope you see it too as seen through my eyes.    


Thank you for stopping by!  Peace, love, and sunflowers!


Sunday, June 9, 2013

Happy June!

Hello bloggers!  I know that my posts are few and far between lately.  To say that my life has been a little bit of a whirlwind is an understatement.  I've been jet setting and just trying to keep a handle on everything that life throws my way.  Nothing too overwhelming, just crazy busy.  But honestly, I wouldn't know what to do with myself if my life didn't require a safety belt even when not driving.  

Although I have been doing a significant amount of shooting (for someone who doesn't advertise), I decided that it's time to refocus my time on my art.  At least for the summer.  I miss it.  It's just that simple.  It's tough when you have two things that you are very passionate about --for me it's my art and my photography.  I haven't mastered juggling both successfully.  One of them always ends up overwhelming me and not in a good way.  Do you juggle too?  How do you do it?

Anyway, in an effort to kick start my creativity in mixed media I decided to host a tag swap for the month of June at Artsy Fartsy.  Yeah, I said June.  I can't believe we're almost half way through the year of 2013.  But anyway --back to me kick starting my creativity.  Uhhhhhhh...::crickets::  So it didn't jump start quite as quickly as I thought it would but nevertheless I got some tags done.  Woot, woot!  And that's a lot to be happy about.  So let me show you what I made this morning...

Remember you can click on the images to view them larger.

I just love this little guy --he is so cryptic and mystical and well, there's just a whole lot going on with this little fella.  But I can't help but feel sadness when I see him.  The technical stuff:  Mustard Seed Distress Ink all over tag then I cut out a mask of the little guy and positioned it where I was going to stamp him.  Then I covered the entire tag with Peeled Paint Distress Ink.  I stamped the vines from the Dylusions line and then I removed the mask and stamped my little Creep.  Yep, this one inspired by Radiohead's "Creep".  I also shaded the edge of the tag using Vintage Photo Distress Ink.

I made three pretty identical tags for my swap --they all basically look like this one.  I first covered the entire tag with Peacock Feather Distress Ink and then shaded the edges of the tag with Vintage Photo Distress Ink.  I wish I could remember who makes the stamp I used for this tag but I don't have that in front of me so I will update it when I have an opportunity.  The hardware is from the Ideaology line and the "journey in time" stamps are from Maya Road's art journaling stamp set.

I love, love, love, love, LOVE the gold stars!  The stars are courtesy of a new stencil by Heidi Swapp.  I positioned the stencil on the tag and then covered the stencil with gold embossing paste by the fabulous Wendy Vecchi.  I actually took one of Wendy's classes last weekend!  But more about that later.  Anyway, I think these stars are the bees knees.  ::big smile::  The final step in these tags was misting perfect pearls innnnnnnn...oh crap, I don't remember the color.  I want to say Sunflower Sparkle but I think that may be incorrect.  Again, will get back to everyone on this.  But I do want to say that the mist and stars added a whole lot of magic to these tags!

This one is oh so pretty --I used my favorite distress ink color, Mustard Seed.  I shaded the edges using Vintage Photo Distress Ink and all other steps mimic the ones already mentioned above.  Pretty neat, eh?

As I mentioned a second ago, I had an opportunity to take a class with the fabulous Wendy Vecchi.  It was a technique class and I'll admit that I knew 75% of what she taught that day but the class was still interesting and I walked away with a bunch of tips and some new techniques.

Alright, I will do my best to not be a stranger.  I will post photos soon from some of my recent shoots and adventures.  Until then...peace, love, and never truly losing your creative spirit.  :)


Sunday, April 28, 2013

Uhhhh yeah

I wish I could say that I've got a handle on my life right now but the truth is that I do not.  Too much going on at once --I can't keep my focus in one place for too long.  Lots of good things happening, I just can't seem to wrap my arms around one for too long.  ::exhale::

So April has been insane, May will be even crazier and June --well, I haven't even thought of June yet.

Here is some of my April in snapshots:  photo shoots with models, senior portraits, twin boys, a trip to the zoo, an afternoon at the Fort Worth Stockyards, and Make-n-Take Madness at The Crafty Scrapper.  That's just SOME of my crazy life.

But hey, I'm happy to report that I'm taking some much needed time off in THREE MORE DAYS!!!!!!!!  The countdown starts NOW!


Monday, April 8, 2013

Oh the madness!


Join me and an amazing group of talented teachers and designers at this years Make-n-Take Madness!  The entry fee is only $20 and you will visit 10 inspiration stations, create something, and take it home!  Plus we are also celebrating The Crafty Scrapper's 8th Birthday so there will be cake and refreshments, plus prize drawings and scratch off tickets which will give you 10-40% off any in-store purchase.  To see some of the projects and meet the team, go here.

What will you create when you visit Ms. Ruin's creative station? 

You will turn this:

Into this:


Pretty cool huh?  Plus, I will have a small token for you to take home, this postcard featuring my photography --seen below. I hope it ignites your creativity!  I might also have a random prize drawing for everyone that visits my creative station.  You'll have to stop by and see me to find out!

Make sure you call and reserve your spot, seating is limited.  See you on Saturday!

Peace, love, creative madness!

Sunday, April 7, 2013

Oh no she didn't!

I have agonized for more than two years about getting bangs.  I have been told repeatedly that my forehead is to small for bangs but I finally found someone to take a chance on me.  I've gotta tell ya, I LOVE my new look!

Yep, I finally got bangs yesterday!  They make me want to be even more creative.  I really feel like a new woman.  ::BIG SMILE::  Alright, are you ready to see Ms. Ruin post-bangs???

BAM!


This was the first photo I took just shortly after my cut.  Sorry, it's a cell phone pic so not the best lighting.  But how cute are my bangs?  Said like Monica Geller Bing, "I KNOW!"  ::nerdy smile::

And these were from later in the evening --all dolled up and ready for a night out.  


So there you have it...girls with tiny foreheads CAN have bangs.  I'm proof!

Peace, love, and awesome hair.  :)

Friday, April 5, 2013

I feel so alive!


Hello bloggers!  I am still alive.  I know it's been a while since I've made a post but life has been a ball of beautiful chaos lately.  I am so blessed to be involved in so many different projects and to have the support of my friends during this crazy period of my life.  Everyone wants to see what I create next, what I shoot next.  I am overwhelmed in the best way with the last few weeks which have ignited so many ideas that are quickly taking shape.  I am truly making strides in my artistic life and in my personal life (YAY!) and becoming a person that I am truly proud to be.  Although I don't share much of my personal life here, or with many at this point, I do thank you for letting me share my artistic journey with all of you.  

I will try to catch up with my blogging over the weekend.  I do have an event that I need to
promote.  I just need to get through a day of baking clay for said event, wrapping up edits for clients -sooooo many pictures, a mini maternity shoot, and my first MLB game of the season --GO RANGERS!  Have a magical weekend and don't forget to check out all of my latest photography here and my mixed media here.  

Peace, love, and Pony tail Friday's.  :)


Tuesday, March 12, 2013

Spring Fling & Regal Tweets


Yep, it's time for my annual Spring Fling Sale!  I'm really energized about this sale because it's the one time of year that I can pump a bunch of new items into my shop.  I have a lot of new items coming so check back often, plus the sales will change weekly.  Take advantage of the current deal now by using the code SPRINGFLING15 at checkout.  That's 15% of all shop items over $5.

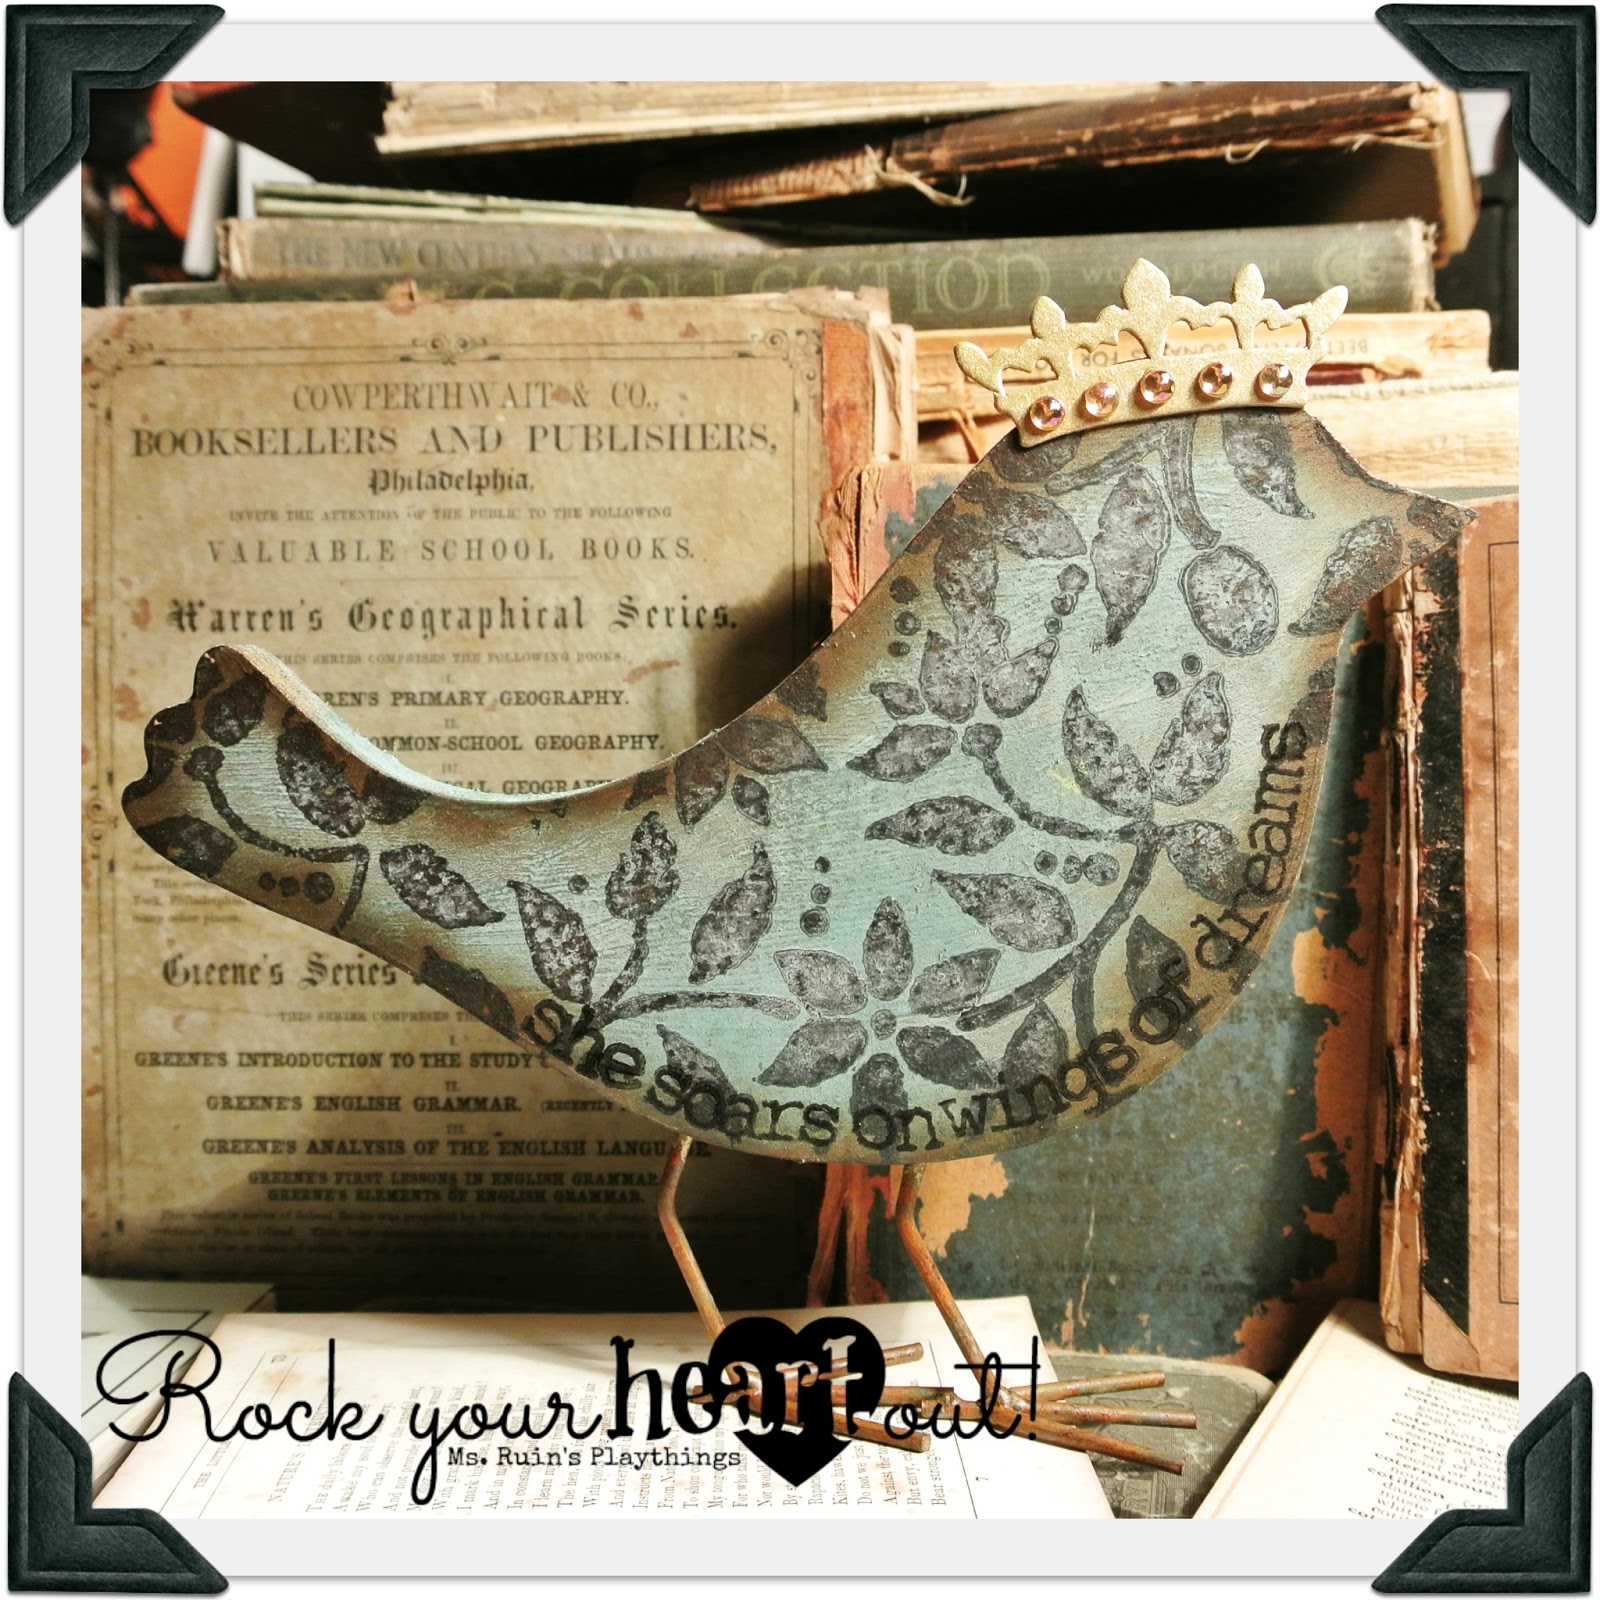
Here is a preview of some of the new items in my shop.  They're back....REGAL TWEETS!  

My favorite thing about all of the tweets I've made is that they are all different but they all serve the same purpose.  They bring comfort, smiles, encouragement and inspiration.  These little guys are perfect for your home or office and make beautiful gifts too.  All four of these dapper little fellas are currently available and I've got the elves in my studio working on more.  When I say elves, I mean me.  :)  I love, love, love the texture in tweet no. 2 and tweet no. 4.  Click on the images to view them larger plus the listing link can be found below each tweet (more photos available by clicking on the links).


I'm ready to fly home to you...click here to give me a home.


Map?  I don't need a map. I know the way to your heart.  Click here to give me home.


I will be your wings of dreams.  Click here to give me a home.


And I will be your wings of faith.  Click here to give me a home.


Thanks for looking!  Peace, love, and tweet, tweet!

Tuesday, February 26, 2013

Linen Album

Hello bloggers!  I am a little behind with my blogging but here I am, fingers to the keys, and the Avett Brothers serenading me in the background.  I have been working with canvas quite a bit lately but I also completed a design team project and that's what I'm going to share in this post.    I am not making a product list, I will just talk about some of the things I used and the techniques where I feel a prompt is necessary.  But you can always leave comments if you are curious about something.  Also, remember that you can click on the images to see a larger view of the project.  

Ladies and Gentlemen, I give you THE NEW MAYA ROAD LINEN ALBUM!  Hahaha.  


This is a 4x6 linen album by the folks at Maya Road --in case you didn't catch that earlier.  This is new to their inventory and I've got to say, it was so much fun to work with.  The album is fabric so it does not stand on its own, however, I used cardboard in this baby so it NOW stands on its own!


This super cute project was made possible by my super cute nephews, Jack and Jacob.  A big thank you to one of my best friends, Rae, for letting me use her adorable babies in my book.  Oh, I wanted to add that I did take these photos so I didn't feel too bad using them.  LOL.  Plus this will be a gift for Rae once it is returned to me.


About the cover:  I used hardware by Tim Holtz and then adhered a Maya Road flower to the center.  The pretty burlap piece is by Little Yellow Bicycle.  Definitely one of my newer and most favorite products!


This page has TOO MUCH CUTENESS I almost can't stand it!!!!  This is one of the pages in which I chose to use corrugated cardboard.  I poured paint right onto the cardboard and let it run.  Once it dried I distressed it with Vintage Photo Distress Ink by Ranger.  The crown is chipboard by Maya Road which I dabbed with gold acrylic paint.  The linen tag is also by Maya road.  The cork tag is by Little Yellow Bicycle.


My name is Sonia and I love cardboard.


Meet Jack!  More cuteness!  The canvas star embellishment is by Little Yellow Bicycle (LYB) and the flower and bird are by Maya Road.
 

I wanted to point out that I did use gold alcohol inks on the bird.  I also cut a heart out of corrugated cardboard (surprise, surprise), painted it with white crackle paint and then distressed the edges.  


Twine, arrow stamps, and house by Maya Road.  Flower by Prima.  Key by Tim Holtz.  Stamp on tag by Tim Holtz...it's from the Classic Favorites Collection and it has seriously become one of my very favorite stamps.


I wanted to highlight this sweet little bird.  I used the bird in the previous page as a stencil and drew this little guy on burlap.  Then I stamped the word "soar".  The stamp is from the Art Journaling stamp set by Maya Road.


Okay, I decided to cut out two little burlap birds!  This one I misted and then added ribbon and a button.  The possibilities are endless!


I wanted to point out the cutting technique I used here.  I first stamped the paper using another stamp from the Classic Favorites by Tim Holtz/Stampers Anonymous, then I cut along the lines using an exacto knife.  I then slid the photo under the stamped portion of the paper.  Does that make sense?  With this technique you don't have to worry about matching up paper.  


Awesome embellishment by LYB!


I decided to make a pocket at the very end because I had a bunch of photos left.  Cardboard is your friend.  Check out those grungy alphabet stamps --new from Tim Holtz.  


There is no REAL reason for this photo --other than I wanted to show you more cuteness.


Oh!  Here's another bird that I cut out using the Maya Road Vintage Trinket Bird as a stencil.  I kinda have a bird problem too.  But I make not apologies because it's "my thing".  The burlap is by LYB and that gorgeous trim is by Maya Road????  Maybe.  I'm not 100% sure but I will find out.  :)

Thanks for visiting and viewing my project.  Come back soon for previews of the March Madness Sale at Ms. Ruin's Plaything Etsy.

Peace, Love, and The Avett Brothers


Sunday, February 17, 2013

New Listings!

I've got three new listings in my Etsy Shop and they are SUPER AWESOME!  Click here to access the store and if you don't see anything you like, come back in March for the March Madness Sale.  LOADS of new stuff coming to my shop...not only jewelry but mixed media too!  Until then...here is some eye candy.  

Click on the image to take you to the listing.  


Linen Love


Stay tuned!  I will be posting about this lovely piece tomorrow.  It's a BRAND NEW linen album by the folks at Maya Road!  Just look at all of the delicious details!!!