Hello fellow bloggers and crafters. I know that it has been a while but I just haven't been crafting as much as I'd like too. However Fall and Winter will be with us for a few months so I suspect that I will have more time at home to get crafty.
Halloween has always been my very favorite time of year. The cool Fall breeze, the leaves change, pumpkin patches, soup for every meal, and haunted houses...just a few things I love about this time of year! Now if only it would truly start to cool down in Texas...but cooler weather or not, I did make a few Halloween themed projects. These are primarly design team projects but nevertheless, it's my little contribution to this fabulous time of year.
SPOOKTACULAR PROJECT NO. 01
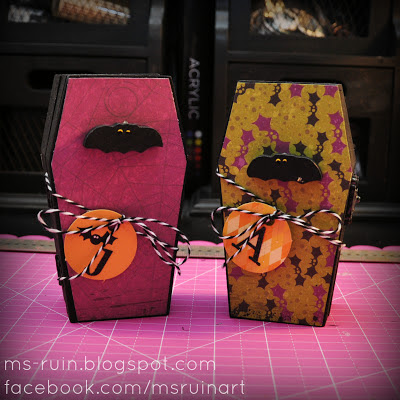
First and foremost are these super cute coffin shaped treat boxes that I made for my nephews. I bought these coffins at Michaels in a natural wood color. The really cool thing is that when you open them, you hear a really sinister laugh. Bwahahahaha.
HOW TO:
- Paint coffins black.
- Cut out covers and bottoms for the front and back side of the coffin using Halloween themed scrapbook paper and adhere with glue.
- Add embellishment to the front of the coffin --I used black wooden bats.
- Punch round tags out of Halloween themed scrapbook paper and add letter stickers.
- Tie tag around coffin door with twine.
SPOOKTACULAR PROJECT NO. 02
My next project is a Halloween mini album that is filled with photos from my trip to Salem, MA in 2010. I want to point out the technique I used on the time pieces. Those die cut clocks are actually printed on kraft paper by Maya Road. So how did I get that black glossy look? See the steps below...
FYI: This is what the clocks look like before inking them up.
HOW TO:
- Choose a distress ink pad color --I chose to use black (Ranger Distress Ink Pad).
- Apply color to kraft paper using a blending tool.
- Using a baby wipe or moist paper towel, wipe down kraft die cut. The white on the kraft paper serves as a resistant.
- Adhere die cut to cardboard, chipboard, or cardstock to make sturdier.
- Cover die cut with embossing liquid.
- Pour clear UTE (Ultra Thick Embossing Powder) or regular clear embossing powder and apply heat with a heat gun.
The majority of the paper in this book is by Moxxie.
SPOOKTACULAR PROJECT NO. 03
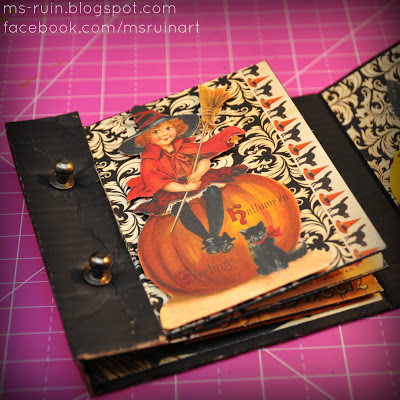
This project was so much fun to make --it's a vintage Halloween matchbook that features paper by Reminsce. I created the actual matchbook using cardboard which I painted black. Have I mentioned how much I love using cardboard?
I decorated the inside of the book with several of the lovely Halloween images. It's just an all around fun book to thumb through.
SPOOKTACULAR PROJECT NO. 04
I'm not big on scrapbooking and I have always said that I'm not very good at it. In fact, I'm just a very simple scrapbooker. For me, a scrapbook project is about the photo(s), that's the most important component for me. I try not to overebellish and take away from the story that is being told in the photo. This particular layout features a very interesting black bird that caught my attention. The paper is very beautiful and it is by My Mind's Eye.
Thanks for visiting!


