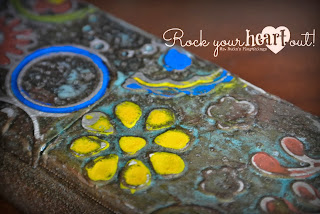
Happy New Year! I know it's been a long while since I've blogged but believe it or not, I did manage to do a little crafting over the holiday's and I wanted to share those projects with you. Not to overwhelm myself, lets start with these wood & metal crosses. Let me just say that I think they are MUCH MORE beautiful than these pictures can show you. I wish I had photographed them with a different camera but what's done is done. Remember that you can click on every image to view it larger.
I would like to thank my friend Carolyn Ross for showing me how to make these gorgeous crosses. Honestly, I could not have done it without her and believe it or not, I'm not the best student. So I'm going to do my very best to give you instructions on how to make your own cross!
Supply List: Wooden Cross, Metal by the Sheet, cuttlebug and embossing folders of your choice or other embossing machine, 8x10 or 12x12 sheet of scrap paper to make a template for your cross, Sharpie or permanent marker, Scissors, VerDay Paint & Patina, Humungo Killer Adhesive, a fibrous burnishing tool, sanding tool or block, narrow paintbrush, Vintaj Patina Opaque Inks in colors of your choice, and Vintaj Patina Glaze.
Directions:
1. Trace the wooden cross onto the scrap paper to make a pattern/template, then cut it out.
2. Paint wooden cross one solid color using a VerDay Paint of your choice. Let it dry.
3. Apply Humungo Adhesive to metal and then cut metal so that it fits in the embossing folders. You'll want to cut enough to emboss various patterns in order to have a patchwork effect like the crosses seen here)
4. Run embossing folders through cuttlebug using various patterns. HUGE TIP: Put metal in folder upside down to make inverted patterns that will be fun to fill in with the opaque inks later in the process.
5. Trace parts of the paper pattern from step one onto different pieces of embossed metal using a Sharpie. This is where you get the patchwork effect. I know this step sounds confusing so here is a visual to help:
Notice that all of the areas that are circled in yellow are different patterns I created using various embossing folders.
6. Now that you have your metal cut out, apply all pieces to the wooden cross.
7. Burnish the edges of the metal where they meet the wood using a fibrous burnishing tool.
8. Apply VerDay Paints --as many as you'd like, get crazy! While paint is wet, spray patina directly onto the VerDay Paint. Let dry --for several hours or overnight to allow paint to oxidize.
9. Sand down entire cross so that some, not all, but some of the metal is visible. Blow air on cross to eliminate particles after sanding.
10. Time to add some color! Using the Vintaj Patina Opaque Inks of your choice and a small/narrow paintbrush, fill in as many of the patterns on the cross as you'd like. You can do all of it or just some of it. It's completely up to you! Let dry completely.
11. Sand the entire cross down again to give the paint you just applied a distressed look. Blow air on cross to eliminate particles after sanding.
12. LAST STEP --this is the truly magical part: Apply glaze to entire cross. You can either use your finger to spread it, which I did, or a lint free cloth --I did that too with one of the crosses but I found that my finger is most effective. This is going to give your cross a glorious shine! Let dry and hang on wall. :)
Optional Steps:
1. Paint back side of cross once the glaze has completely dried or before starting your project.
2. If your cross did not have a hook in back for hanging, you can drill a whole so that the cross lays flat against the wall on a nail.
Phew! That was quite a bit of work but all in all it was easy and very rewarding. I will leave you with some close ups so that you can see some of the detail and how all of the elements come together to make a gorgeous piece of wall art.
Peace, love, and many blessings in 2014!
Ms. Ruin


No comments:
Post a Comment