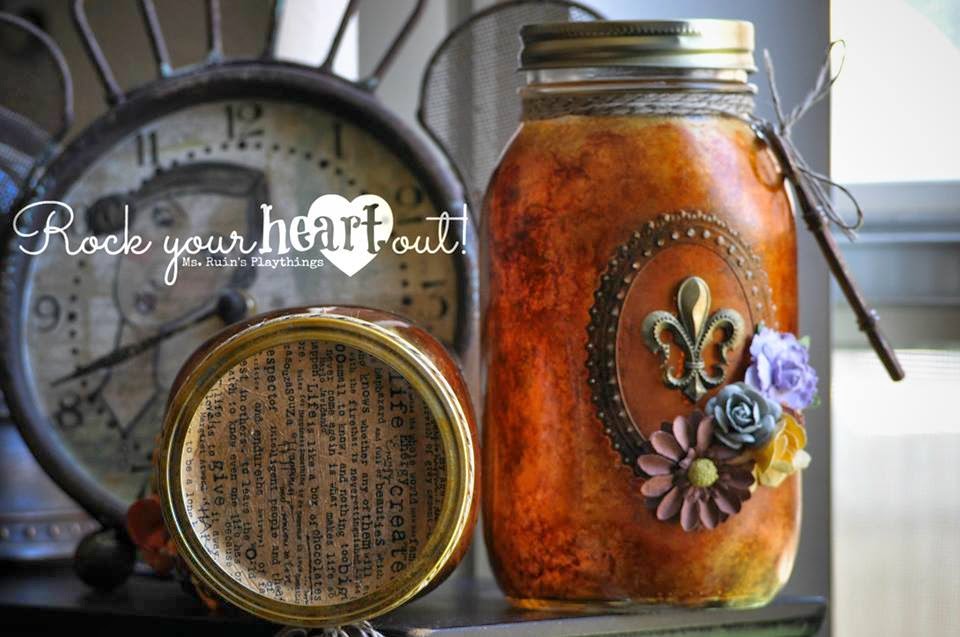
Hello bloggers and blog readers. I've got a few projects I've worked on lately that I want to share with you but for today we'll zero in on a couple of gorgeous altered mason jars.
As you know, I run Artsy Fartsy, a swap community on Facebook, with the help of my friends DeeDee and Genie. Each month we host a swap and for the month of March, DeeDee hosted an altered mason jar swap. My partner told me she enjoyed vintage styling and she lives in Louisiana so a fleur-de-lis would be to her liking. So with that little bit of insight I got to work.
Ms. Ruin's Supply List:
Basic Crafting Tools
Alcohol Inks and a dauber
Paper Flowers
Embellishments
Twine
Tissue Paper
The first step I took to create this gorgeous project was that I applied a decorative oval shaped sticker to the jar. This particular one is from Tim Holtz's Idea-Ology Industrious Stickers/Borders.
I then started inking the jar with alcohol inks on the outside only. I used about three or four different colors, I believe they were ginger, butterscotch, raisin, and gold. I applied one color at a time. Keep in mind that you don't have to cover the entire jar with each color. I however did cover most of the jar each time I applied an ink. The key to getting that marbleized look is to simply tap the jar with the dauber repeatedly --kind of like using a sponge when sponge painting. The gold ink was the only metallic I used. I made sure to make it the last ink that I applied all over and then I went back over it here and there with other colors. (Helpful tip: Keep alcohol blending solution on hand just in case you don't like the way your project is looking, you can apply the blending solution and the inks will wipe right off. )
The ink dries very quickly so I was able to move on to the next step within seconds. I wanted to bring out the details of the sticker a little so that they wouldn't get lost behind all of the inks I had just adhered so I took a sanding black and just scuffed it up a bit. Since the sticker is paper, white was exposed. I went back and dabbed alcohol inks over it. You can also use distress inks for this.
I took a handful of flowers from my flower stash and adhered those to the bottle with hot glue. And trust me, those babies are not coming off of that jar without a fight. I then applied the fleur-de-lis which is an embellishment I had in my collection for many years. I used E6000 to adhere the embellishment. One of the final steps was to wrap twine around the neck of the jar and then I tied down the key. There is one final step which I will cover in a sec.
I actually had two jars on hand so I decided to decorate a second jar for a friend. I used all of the same steps except that I stenciled the first letter of her name on the jar rather than using a fleur-de-lis embellishment. When it was all said and done, I kind of wish I had also used an embellishment because she too is from Louisiana! But I think it's just as pretty and personalized. :)
Alright, the final touch on these jars was adding this printed tissue paper to the lids. Remember, mason jars have those little plates that come right off so what I did is I traced the circle onto printed tissue paper, this paper is by 7 Gypsies. Then I applied glue and seal to the plate and adhered the tissue. Once that was dry I put a coat of glue and seal over the tissue to protect it from tearing. Ta-da! Project complete.
What's next at Ms. Ruin's Playthings? In my next post I'll be showing you these sweet little hoots that hatched in my craft room over the weekend. Until next time...
Peace, love, and alcohol ink!


No comments:
Post a Comment